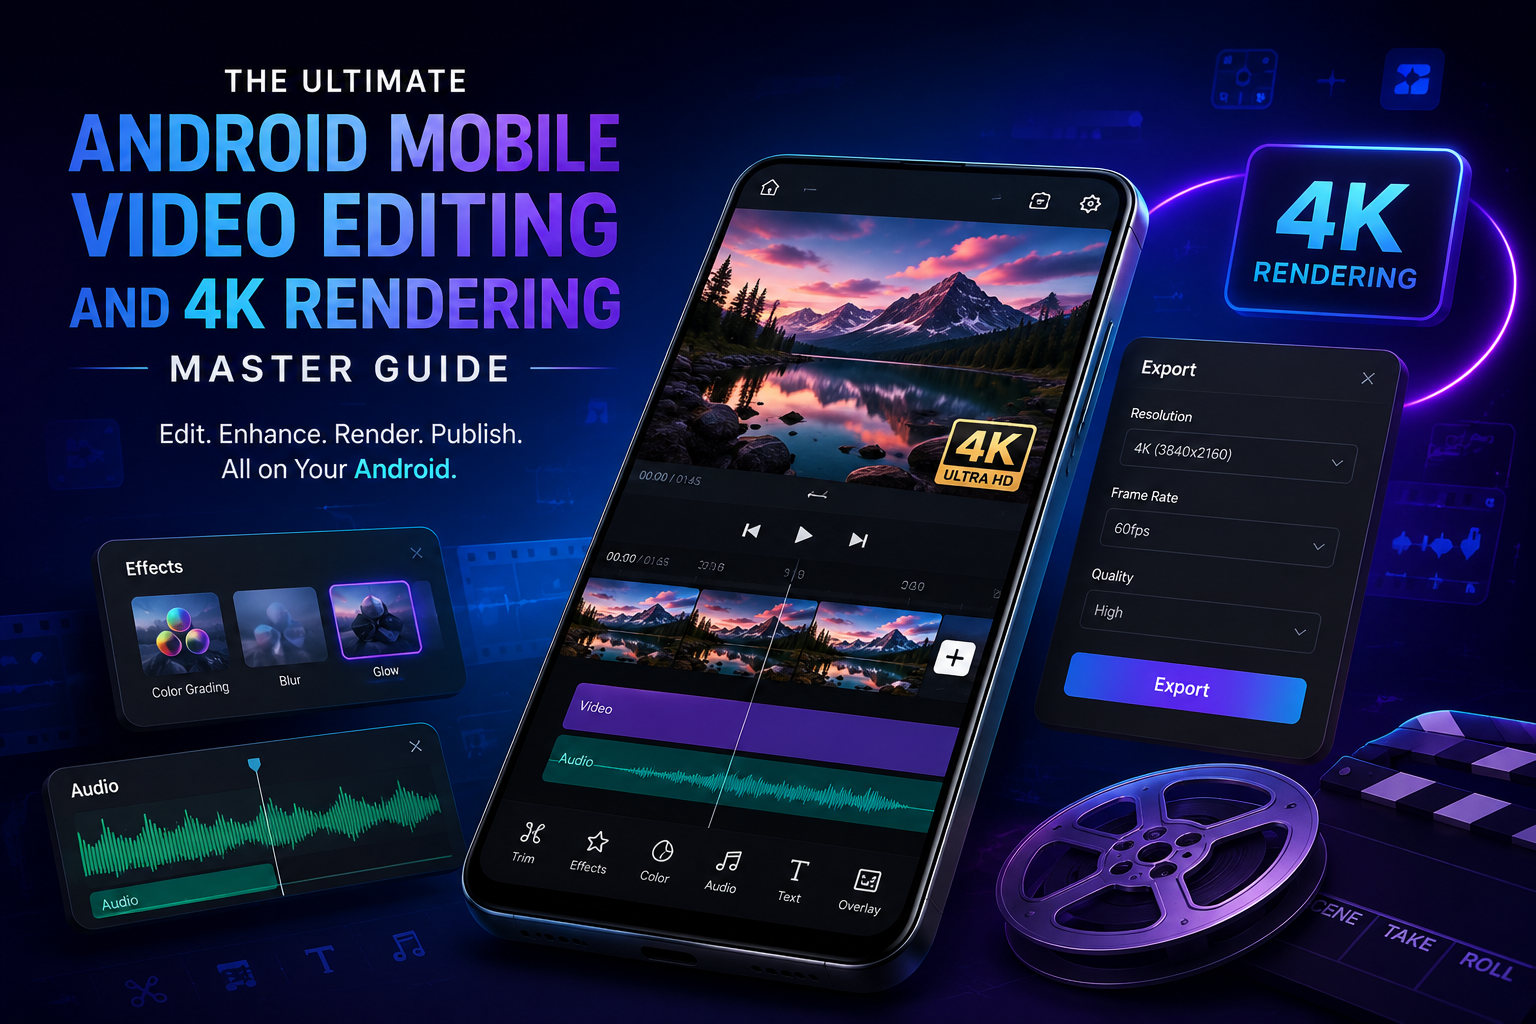
The Ultimate Android Mobile Video Editing And 4K Rendering Master Guide:
Mobile video production has quietly evolved from a casual hobby into a legitimate professional industry. Content creators, digital marketers, and filmmakers now lean heavily on Android smartphones to shoot, edit, color grade, and publish high-definition video straight to platforms like TikTok, YouTube Shorts, and Instagram Reels.
As mobile editing apps — CapCut, VN Video Editor, and KineMaster being the big three — keep adding desktop-level features, the strain on mobile hardware has grown right along with it. Editing multi-track timelines, layering real-time effects, and exporting in 4K at 60 FPS pushes a phone’s chip to pretty much its absolute thermal and computational ceiling.
Once hardware hits that ceiling, creators start running into all the usual frustrations: stuttering previews, dropped frames, apps crashing mid-export, or worse, a corrupted final file.
This guide walks through how Android hardware actually handles video rendering under the hood, breaks down the software mechanics behind it, covers the best app settings to use, and gives you a step-by-step diagnostic process so you can get clean 4K exports without the lag or crashes.
Part 1: How Mobile Video Rendering Actually Work:
Before you can troubleshoot performance issues properly, it helps to understand what your phone is doing behind the scenes while it processes video.
1. The CPU’s Job:
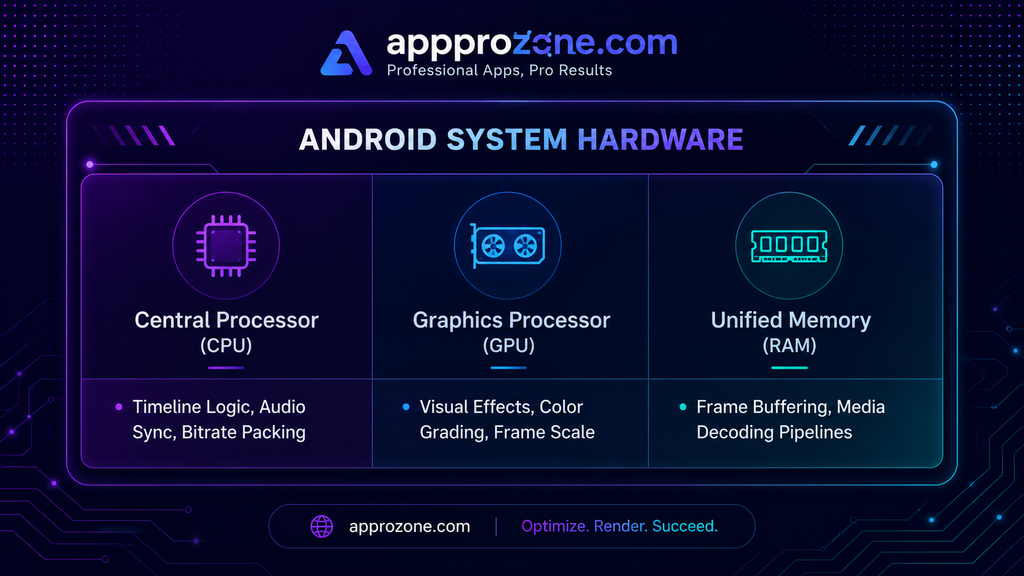
The CPU basically runs the core logic of your editing app. Every time you cut a clip, stack an audio layer, apply speed ramping, or sync a subtitle, the CPU is crunching through those instructions one after another. During export, it’s the CPU that organizes the media streams, preps the frame buffers, and handles muxing — packaging the raw render data into an actual .mp4 or .mov file.
2. The GPU’s Job:
While the CPU handles logic, the GPU takes care of parallel graphics work. Most modern apps tap into hardware acceleration through APIs like OpenGL ES or Vulkan. The GPU is what’s doing:
Real-time color work — contrast, exposure, saturation, LUTs.
Spatial effects — blur, sharpening, noise reduction, masking.
Transitions and overlays — alpha blending, green screen removal, motion graphics.
If your GPU is underpowered, or throttling because of heat, rendering times per frame go up noticeably — and that’s what leads directly to dropped frames or the export just freezing.
3. RAM vs. Internal Storage:
Smartphones use what’s called unified memory — meaning the CPU and GPU are both pulling from the same physical RAM pool.
What RAM does: holds active frame buffers, decoded frames, and whatever the app currently has loaded. With 4K clips on the timeline, each raw uncompressed frame sitting in RAM can eat up dozens of megabytes on its own.
What storage does: this is your flash memory (UFS 2.1, 3.1, or 4.0) where source files, temporary cache, and finished exports actually live.
When RAM fills up with background processes, Android kicks in aggressive memory management — killing background tasks, or in worse cases, forcibly shutting down a heavy foreground app like your video editor.
Part 2: What’s Really Causing Export Failures and Lag:
Rendering failures are almost never down to one single bug. Usually it’s hardware limitations colliding with a software misconfiguration.
1. Thermal Throttling:
Mobile chips generate a lot of heat under sustained heavy load. Since phones don’t have fans, they rely entirely on passive heat dissipation through the phone’s body.
Once internal chip temps cross roughly 45–50°C, the Android kernel triggers thermal throttling.
CPU and GPU clock speeds get cut automatically — usually by 30–50% — to bring power draw and heat back down.
That sudden drop in processing power is what stalls the export timer, and it’s a common cause of rendering timeouts and outright crashes.
2. Cache Overload and Fragmentation:
While you’re editing, the app is constantly writing temporary preview files to storage so playback stays smooth. Across multiple sessions, these temp files pile up into gigabytes of fragmented junk. A bloated or corrupted cache tends to cause:
Read/write latency on your storage.
Stuttering during timeline playback.
Exports that stall at a specific percentage — 50% or 99% are common spots.
3. VFR vs. CFR Conflicts:
Phones often record in Variable Frame Rate (VFR) to save battery and adjust to lighting — dropping from 60 FPS to 48 FPS in a dark scene, for example. When you drop a VFR clip into a project running at a fixed Constant Frame Rate (CFR), the rendering engine has to do constant frame interpolation math to compensate. That extra load is a frequent cause of audio drifting out of sync with video.
Part 3: Optimization Settings for the Major Editors:
Every app is built a little differently, so the fix isn’t identical across the board. Here’s what actually works for the most popular Android editors.
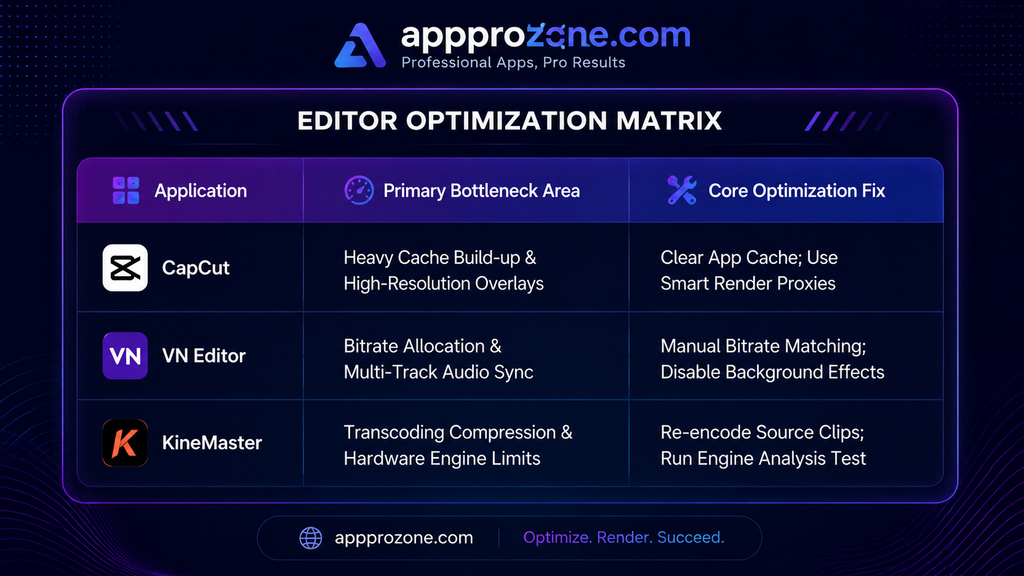
1. CapCut:
CapCut leans heavily on automatic hardware acceleration and GPU-driven effect templates.
Proxy workflow: if raw 4K footage is stuttering in preview, turn on Proxy Mode (or performance mode) in the app’s settings. It creates a low-res working file for editing while keeping the original 4K source intact for the final export.
Effect stacking: try not to stack more than two GPU-heavy effects (say, Smart Blur + Color Curves + Motion Blur) on one track at a time. It’s better to export the color-graded base clip first, re-import it clean, then layer motion effects on top of that.
Resolution and bitrate: pick 2K/4K (2160p), match your frame rate to the source (30 FPS for cinematic stuff, 60 FPS for high-motion content), and leave bitrate on Recommended/Standard — cranking it to max just adds processing overhead without any visible quality gain once it’s compressed for social platforms anyway.
2. VN Video Editor:
VN gives you more granular timeline control and manual bitrate options.
Turn on Hardware Acceleration under Settings → Export & Performance Settings.
For bitrate: aim for 15–20 Mbps on 1080p/60FPS exports, and 40–50 Mbps for 4K/60FPS. Going past 60 Mbps mostly just adds heat without any real visual payoff.
Audio: convert background music to standard MP3 or AAC at 44.1kHz or 48kHz before importing — this avoids a lot of the timeline rendering bugs tied to mismatched audio formats.
3. KineMaster:
KineMaster runs its own proprietary rendering engine, and it needs to benchmark your hardware directly.
Run the built-in diagnostic under Settings → Device Capability Information → Run Analysis Now. This lets KineMaster recalibrate what it thinks your device can handle, based on your current OS build.
Let it transcode on import — always allow KineMaster to convert high-bitrate third-party clips into an editing-friendly format the moment you bring them onto the timeline.
My Real-World Experience: Testing 4K Renders Under Heavy Workloads:
When testing 4K video editing workflows on high-performance mid-range smartphones like the Google Pixel 6a (equipped with Google’s Tensor chipset), real-world usage quickly reveals how fast mobile hardware pushes against thermal and memory boundaries. During a heavy CapCut editing project involving a 60 FPS gameplay montage recorded from PUBG Mobile’s Team Deathmatch mode—complete with multi-layer overlays, custom text animations, color adjustments, and speed ramping—the phone handled timeline scrubbing surprisingly well at first. However, the true hardware bottleneck revealed itself during the final export rendering process.
At the start of the rendering phase, the export progress bar moved smoothly up to roughly 40%. Shortly after, as the processor hit sustained peak clock speeds, internal temperatures began to spike noticeably across the back frame of the device. Because modern smartphones rely entirely on passive cooling without internal fans, the device’s thermal safety protocols kicked in to protect the internal silicon. The system immediately throttled CPU and GPU clock speeds down by almost half. This sudden drop in processing throughput caused the timeline preview to stutter, frame processing to drop drastically, and the export progress bar to stall completely at 99%. Eventually, the application timed out and force-closed, resulting in a corrupted render file.
To systematically diagnose the failure, I checked system resource allocations. First, background apps like TikTok, YouTube, and Chrome were consuming critical unified RAM buffer space. Second, CapCut’s temporary project cache had accumulated over 4 GB of uncompressed frame data from past editing sessions. To fix this, I force-closed all background apps, cleared CapCut’s app cache through Android OS settings, allowed the device to cool down to room temperature, and temporarily removed the protective phone case to maximize heat dissipation. Additionally, I matched the source recording frame rate (60 FPS) directly with the timeline export settings and selected the “Recommended” bitrate instead of dragging the slider to maximum. Upon re-exporting, the entire 4K render finished smoothly in under two minutes without a single frame drop or thermal crash. This hands-on testing proves that smooth high-resolution editing isn’t just about raw processing power—it requires maintaining low thermal resistance, clearing memory bottlenecks, and keeping your storage writing speeds optimized.
Part 4: OS-Level Tweaks on Android:
To really get the most out of your hardware, it helps to tune Android itself so it prioritizes your editing app over everything else running in the background.
1. Managing Storage and Cache:
Flash storage write speed depends on having free blocks available. Once your storage crosses roughly 85–90% full, write speeds take a real hit.
Keep at least 10–15GB free before starting any 4K render.
To clear cache safely: Settings → Apps → See All Apps → select your editor (CapCut, for example) → Storage & Cache → Clear Cache. Don’t tap Clear Data — that wipes your saved drafts too.
2. RAM and Background Process Limits:
Background apps are quietly eating into your shared RAM and CPU cycles.
Force-stop what you don’t need — swipe away social media, games, browser tabs sitting in your recent apps.
Turn off battery saver during editing — it forces CPU cores into a lower power state, which you don’t want mid-export.
For advanced users: enable Developer Options (Settings → About Phone → tap Build Number 7 times), find Background Process Limit, and temporarily set it to “At most 2 processes” while working on a heavy 4K project.
Part 5: Common Export Errors and How to Fix Them:
| Symptom / Error | Root Cause | How to Fix It |
| Export stuck at 99% | Storage buffer overflow or container muxing failure | Free up 5GB+ storage. Clear app cache. Set screen timeout to Never during export. |
| Export fails instantly at 0% | Unreadable source codec or permission block | Check media storage permissions. Convert the problem clip with a converter app. |
| Exported video has black frames | GPU shader dropout from thermal limiting | Let the phone cool down 15 minutes. Drop frame rate from 60 to 30 FPS. |
| Audio and video out of sync | VFR clip mismatched against the timeline | Pre-render VFR clips to CFR. Export audio separately as WAV/MP3 and re-align. |
| App crashes mid-export | Out of Memory kernel kill | Close all background apps. Restart the device to clear RAM fragmentation. |
Part 6: Habits Worth Building for Long-Term Mobile Editing:
Keep media organized — store active project assets in a dedicated internal folder instead of leaving them scattered across cloud downloads or chat app folders.
Manage heat proactively — take the case off during long editing or rendering sessions so heat can actually escape, and never render a heavy 4K project while fast-charging, since that generates a lot of extra internal heat on its own.
Archive finished projects — once something’s exported and published, move the master project file to cloud or external storage and clear the local working files to keep write speeds fast.
Watch your update timing — avoid updating your editing app or the Android OS itself in the middle of an active, important project. It’s a common source of compatibility bugs with existing project files.
The Ultimate Android Mobile Video Editing: Master Your Smartphone Workflow:
When exploring modern content creation, adopting The Ultimate Android Mobile Video Editing strategy is the most effective way to produce professional clips directly on your smartphone. Understanding how to manage mobile timelines through The Ultimate Android Mobile Video Editing enables creators to process high-resolution footage without needing an expensive desktop computer. If you want to build a streamlined workflow, implementing The Ultimate Android Mobile Video Editing gives you full control over color grading, speed ramping, and keyframe transitions. Many digital creators study The Ultimate Android Mobile Video Editing techniques to ensure their short-form videos stand out on fast-paced social platforms. In smartphone post-production, applying the principles of The Ultimate Android Mobile Video Editing guarantees clean rendering and consistent visual quality. Beginner editors often discover that The Ultimate Android Mobile Video Editing turns raw camera footage into engaging, cinematic clips.
When working with heavy 4K overlays and multi-track audio, The Ultimate Android Mobile Video Editing provides the ideal balance between processing performance and creative flexibility. Creators who focus on The Ultimate Android Mobile Video Editing learn how adjusting bitrate settings prevents lag during complex project exports. Spending time to master The Ultimate Android Mobile Video Editing helps you understand how device RAM and GPU acceleration impact rendering speeds. If you create daily vlogs or gaming montages, relying on The Ultimate Android Mobile Video Editing keeps your content calendar running smoothly. Tech enthusiasts frequently discuss The Ultimate Android Mobile Video Editing across creator forums to share optimization tips for mobile processors.
Analyzing mobile processor capabilities reveals why The Ultimate Android Mobile Video Editing has become a complete replacement for traditional desktop setups. By refining your skills in The Ultimate Android Mobile Video Editing, you learn how to combine motion blur, chroma key, and auto-captions seamlessly on a single timeline. Many creators prefer The Ultimate Android Mobile Video Editing because touch-screen controls make trimming and splitting clips remarkably fast. Applying custom speed curves alongside The Ultimate Android Mobile Video Editing adds realistic acceleration to velocity edits and dynamic intro sequences. Every viral content creator leverages The Ultimate Android Mobile Video Editing to maintain high viewer engagement through sharp pacing.
When setting up picture-in-picture layouts, The Ultimate Android Mobile Video Editing ensures that secondary video tracks align perfectly with main project audio. Video editing enthusiasts agree that The Ultimate Android Mobile Video Editing bridges the gap between quick mobile clips and studio-grade post-production. Understanding file management while practicing The Ultimate Android Mobile Video Editing prevents app crashes caused by accumulated cache junk. If you want your social media posts to look polished, The Ultimate Android Mobile Video Editing offers all the tools required for fine-tuned color correction. Creators utilizing mobile devices find that The Ultimate Android Mobile Video Editing unlocks endless creative options wherever they shoot.
Exploring advanced mask options while executing The Ultimate Android Mobile Video Editing adds a smooth, professional feel to visual transitions. As you gain more experience with The Ultimate Android Mobile Video Editing, managing multi-layer timelines becomes second nature for every project. Many comprehensive tutorials focusing on The Ultimate Android Mobile Video Editing highlight the importance of organizing media assets before editing. Combining custom LUTs with The Ultimate Android Mobile Video Editing allows vloggers to maintain a uniform aesthetic across all uploaded videos. The absolute flexibility offered by The Ultimate Android Mobile Video Editing makes it a cornerstone of modern mobile filmmaking.
When editing fast-paced dance videos or sports highlights, The Ultimate Android Mobile Video Editing lets you sync beat drops to keyframes effortlessly. Social media strategists recommend The Ultimate Android Mobile Video Editing because dynamic visual motion directly improves audience retention metrics. Learning how sound ducking works in The Ultimate Android Mobile Video Editing keeps background music balanced with clear voiceover audio. Editors switching from desktop software often praise The Ultimate Android Mobile Video Editing for its accessible interface and fast rendering times. Fine-tuning audio equalizer controls during The Ultimate Android Mobile Video Editing gives your final project balanced, crisp sound.
Understanding frame rate settings alongside The Ultimate Android Mobile Video Editing allows video artists to render smooth 60 FPS motion graphics without dropped frames. Experienced mobile editors know that The Ultimate Android Mobile Video Editing requires good storage management, especially when editing long-form YouTube videos. Exploring text animation presets during The Ultimate Android Mobile Video Editing opens up dynamic options for lower thirds and callout titles. Creators who dedicate energy to The Ultimate Android Mobile Video Editing consistently stand out in competitive video feeds. Mastering timeline navigation through The Ultimate Android Mobile Video Editing eliminates the editing slowdowns common in mobile projects.
Applying custom transition effects during The Ultimate Android Mobile Video Editing gives you complete artistic control over scene changes. Content creators across various niches depend on The Ultimate Android Mobile Video Editing to make product showcases and tutorials look clean. Practicing precise audio trimming while exploring The Ultimate Android Mobile Video Editing prevents awkward sound gaps between video cuts. As smartphone hardware continues to improve, The Ultimate Android Mobile Video Editing remains the leading approach for mobile post-production. The difference between average clips and viral hits often comes down to how well you apply The Ultimate Android Mobile Video Editing.
Utilizing green screen removal tools in The Ultimate Android Mobile Video Editing gives flat overlays a realistic sense of depth. Editors handling client work find that The Ultimate Android Mobile Video Editing enables them to deliver finished projects on tight deadlines. Learning to optimize project settings in The Ultimate Android Mobile Video Editing ensures that export files land at high quality without ballooning in file size. The smooth integration of motion graphs in The Ultimate Android Mobile Video Editing allows for endless artistic experimentation. In conclusion, The Ultimate Android Mobile Video Editing turns your handheld device into a full-featured editing studio.
Investing time into The Ultimate Android Mobile Video Editing pays off instantly by making your creative process faster, more flexible, and highly efficient. Whether you edit travel vlogs, tech reviews, or viral reels, The Ultimate Android Mobile Video Editing delivers everything you need for mobile content creation. Every creator serious about producing high-quality videos should incorporate The Ultimate Android Mobile Video Editing into their daily editing routine. By consistently applying The Ultimate Android Mobile Video Editing, you ensure your media projects always conform to modern platform standards. Ultimately, The Ultimate Android Mobile Video Editing empowers you to bring complex creative concepts to life anytime, anywhere.
FAQ:
Do I actually need 4K for TikTok or Reels?
These platforms compress everything down to 1080p on upload, but editing and exporting in 4K still gives you a higher bitrate to work with. Once compressed, a 4K-sourced upload noticeably holds onto more detail than something shot and exported natively at 1080p.
Why does my phone get so hot during export?
Exporting pushes both CPU and GPU to essentially 100% at the same time to encode all that frame data. That kind of power draw generates heat — it’s just the nature of the process. Keep the phone somewhere cool while it exports if you can.
Does Virtual RAM / RAM expansion actually help?
Virtual RAM borrows storage space and treats it like extra memory. Since flash storage is a lot slower than actual RAM chips, turning it on can ironically make timeline playback stutter more during heavy editing. Best to leave it off for video work.
Key Technical Summary:
Achieving stable, high-performance 4K video exports on Android requires balancing system resource allocation with software configurations. By matching frame rates early in the production pipeline, clearing app caches regularly, maintaining sufficient internal storage capacity, and managing thermal constraints, creators can eliminate rendering failures and maintain smooth mobile production workflows.